Ancient history.
Back in 2018 we had something called Rabb.it, a neat little website where me and my friends could share control of the same browser window and watch stuff on it. We watched JoJo parts 1 through 4 like that, for example.
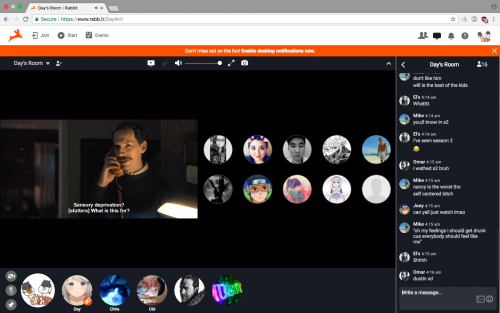
In May of 2018 the service went down without warning, and I would later find out that this was because it had lost all its funding. Maybe it’s for the better that I never saw how they would’ve monetized the platform.
Two immediate alternatives to Rabb.it were available to me, and I would later write a blog post about them: Rabbit alternatives. This post is going to go into more detail on how you can use CyTube and Syncplay, and particularly how you can host files on your own server to watch on the two of those. It will detail how you can setup your own server, get a domain name, host video to watch stuff with your friends, etc.
If you’re interested in something that is actually like Rabb.it then the popular option these days seems to be Hyperbeam Watch Party. I’ll also mention n.eko purely for the fact that it is self-hosted.
Simplest use case (CyTube).
You want to watch Youtube videos with your friends? Set up a CyTube channel and share the link. Awesome. No hassle.
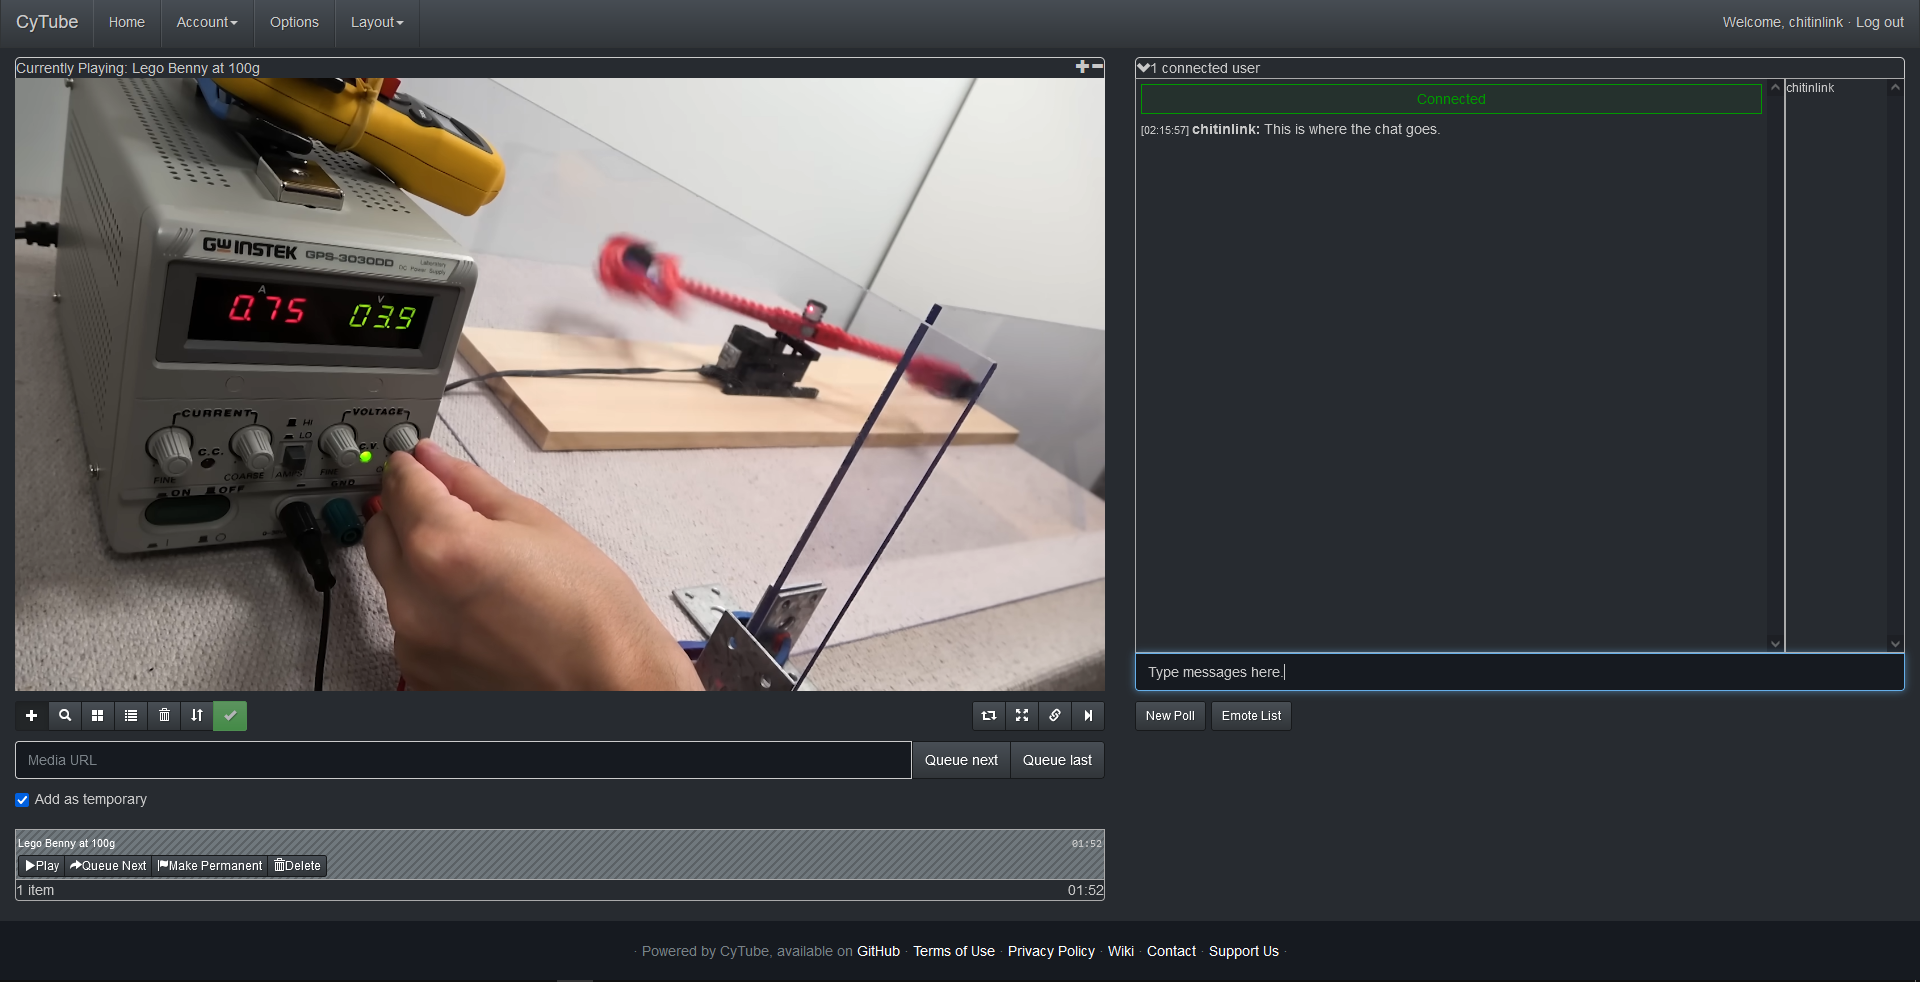
CyTube by default syncs the video on the server, and everyone’s client is always trying to keep up with it. If someone “takes leader” (by right-clicking their own name), then the video will now sync from that person, and everyone else’s client will try to keep up with them. Taking leader is also the only way to pause videos.
There’s a lot of other information I could include here about CyTube, but it’s outside the scope of this post. In short, learn your channel’s settings and poke around the UI. Maybe set a password.
Intermediate use case (Syncplay).
Let’s say whatever you want to watch isn’t on Youtube, or Vimeo, or whatever. If I want to, say, watch some anime with friends, how do I do that?
Let’s also say you and your friends have the same video on their computers. For example, if you all download Big Buck Bunny, and want to watch it together.
If you and your friends have both the same file and Syncplay installed, then you can do that.
Instructions.
First, download and install Syncplay. I also highly recommend installing and using mpv (a video player) with Syncplay for the best experience. On Windows you can get mpv.net.
Then, launch Syncplay.
The way Syncplay works is this: You have the file on your own computer. Your computer plays the file, and tells a server where in the video you are. This server is also talking with all of your friends’ computers, and ensures everyone’s video is synced.
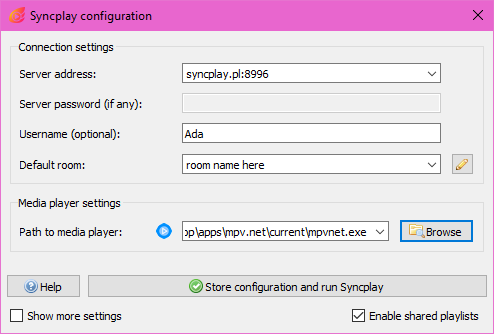
You’ll notice in the Syncplay configuration window that there’s already 5 servers available. Syncplay hosts these servers themselves, which makes this all much easier.
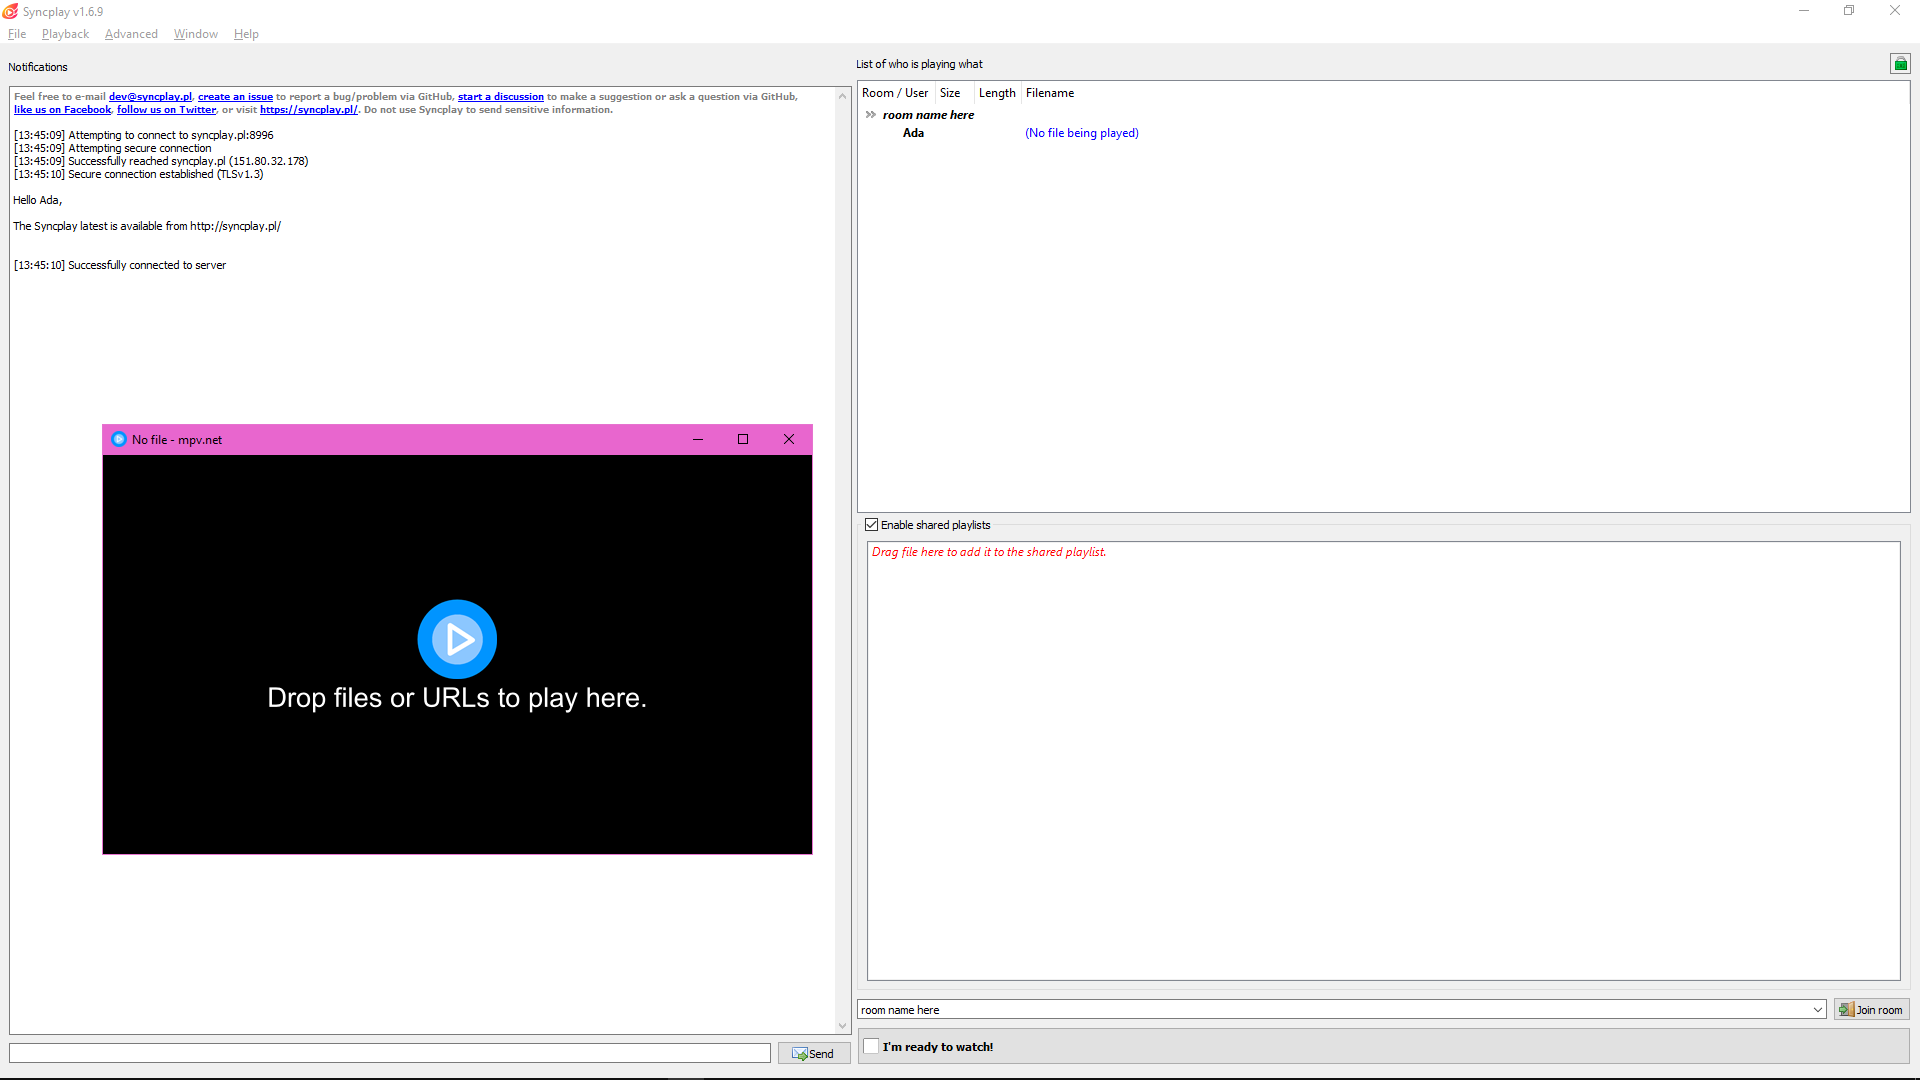
Make sure you and your friends join the same server, and the same room. Once you’re in, you can drag the file you want to watch into your video player, or the playlist in the bottom right.
Once everyone readies up (trying to unpause will set you as ready), the video can be unpaused and will be kept in sync between everyone.
You can also set predefined media directories that Syncplay will look for files in. You can do this in the File > Set media directories menu. I recommend adding your Downloads folder, or some subfolder you plan to put your things in.
Advanced territory (File Hosting).
Let’s say that you want to watch something with your friends, but you can’t get them all to get the same file. Or you don’t want to have to make them do that.
Let’s break the problem down into multiple steps.
Hosting.
If whatever you wanna watch isn’t available online, then you’ll have to put it online.

There are two main ways of doing this. The first is to run a webserver on and expose your own computer to the internet. I can’t recommend this unless you have really good upload speed and you know your ISP won’t complain, and since I have no experience with this, we’ll be looking at the second way:
Purchase a server online and host the files there. Generally, dedicated servers and VPSes have really good upload and bandwidth, so this is ideal.
Server options.
Back in (I think) 2016 I got the Github Education Pack, which is a bunch of free stuff if you sign up for it with a school/university email. Back then, it had a 50€ in DigitalOcean credit, and at the time the cheapest “droplet” (a VPS) they had was 5€/mo. So effectively, I got 10 months of free server, and I ended up paying a bit longer.
Today, they give you an even lower-cost option:
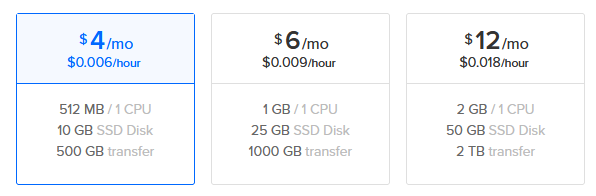
And today, the Github pack actually gives you double what it did when I started!
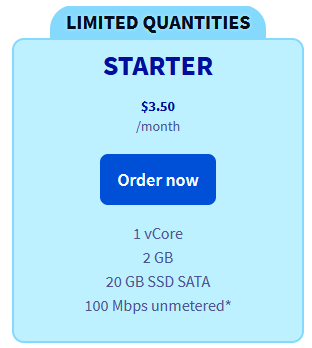
If you don’t want or can’t get the Github pack, then there are cheap options elsewhere too, OVH/Kimsufi has a starter VPS at 3.5€/mo for example:
I’m recommending these extremely cheap options because I think that’s probably the best way to experiment with stuff like this. Don’t get excited if you buy one of these, you probably shouldn’t be running Minecraft on them. Once you’re familiar with how this works and you want more storage or computing power for something, upgrade. These days I’m running this, for about 24€/mo:
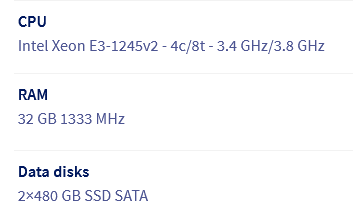
But I’m using this for a lot of things besides just hosting files.
To summarize, I recommend getting the free credit for DigitalOcean from the Github pack if you can, get the cheapest or maybe second-cheapest droplet from there to start. DO is pretty beginner-friendly and have a bunch of guides, too. If you can’t get the pack there’s other options out there, like the OVH/Kimsufi one.
Or just get whatever server you want.
Regardless of what you get, the next section will still apply.
Navigating your server provider.
For the purposes of this guide, I’ll be making a new account on DO.
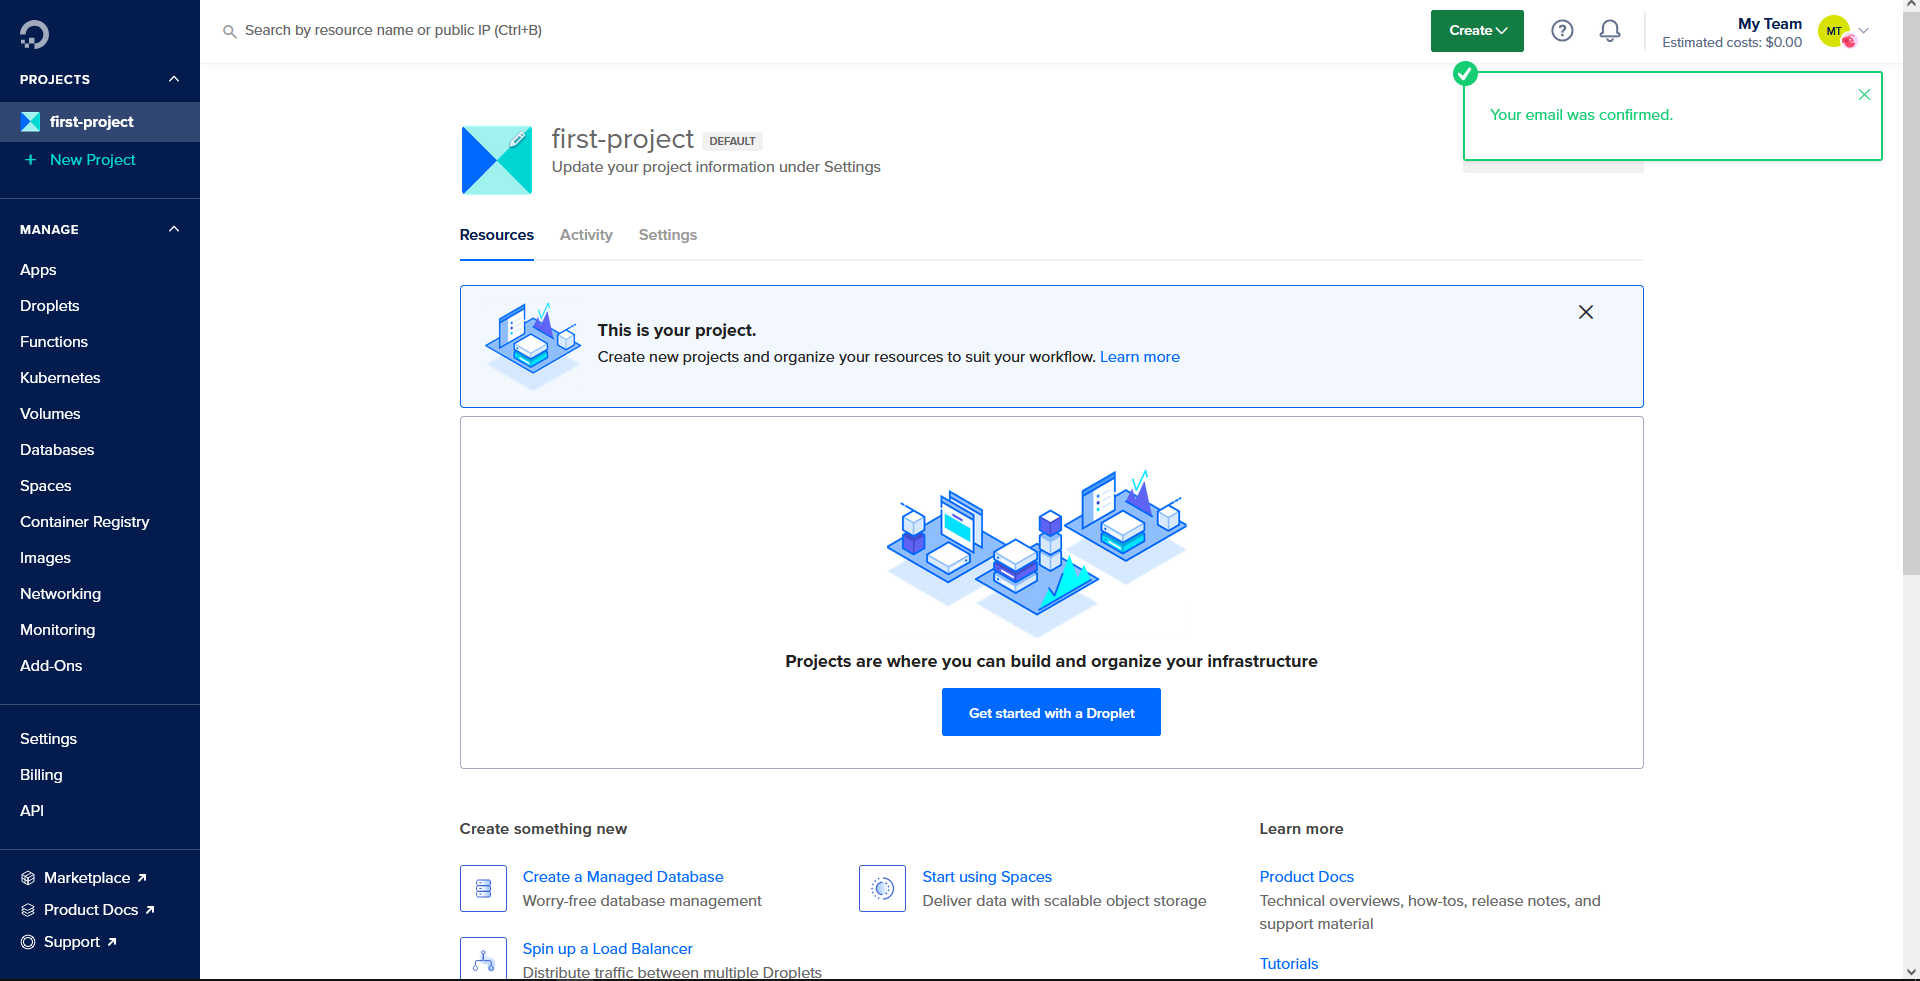
Once I get to the control panel above, I open the Droplets page. “Droplets” are just DO’s stupid term for VPSes.
I’m going to be making a Droplet running on Ubuntu 22.04 x64.
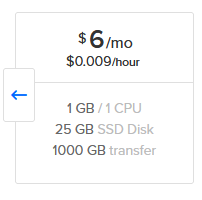
I’m gonna pick this 6$/mo option.
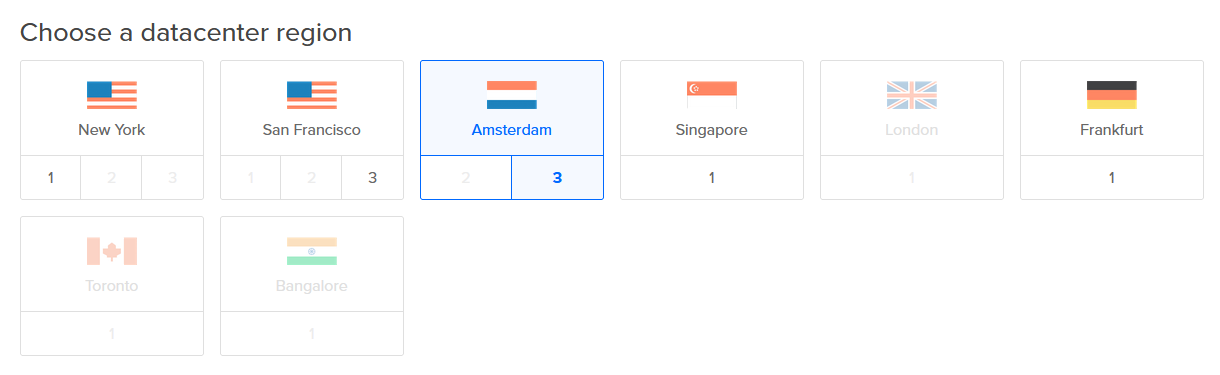
Picking the datacenter region correctly is important. This is the physical location your server will be in, and will determine the ping anyone connecting to it will have. So if you have, e.g. a lot of europeans and americans connecting to your server try to pick somewhere either east coast US or western coast EU. New York or London are good picks in that scenario.
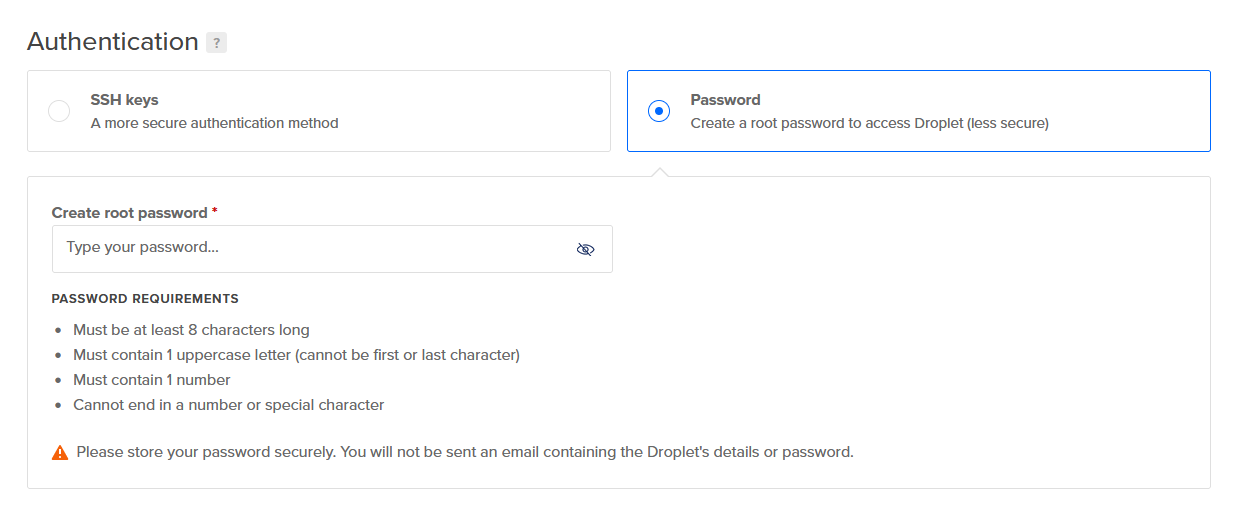
Here DO is asking me to set the password for the root user on the server. In Linux-type systems, “root” is THE administrator account. It’s not recommended to use it directly. More on that later. Here, we’re being made to set a password for it because we will use it log in for the first time once we have the server.
This is a part where DO will likely differ from other server providers. Some might just email you a password to a default user, or make you log in through a virtual console first, instead of letting you set a password like DO is letting me do here.
Anyway. The rest of the options are up to your discretion, at this point I scrolled down and hit “Create Droplet”.
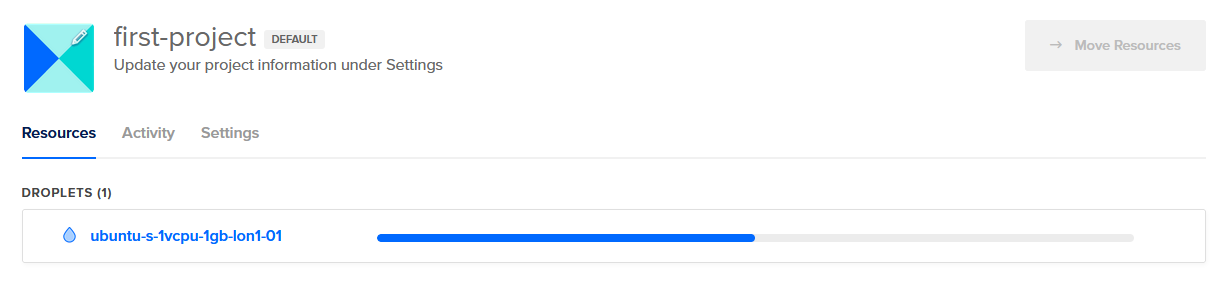
Once you do that, you’ll see a fancy little progress bar while DO sets up your server. Most providers at least email you once this is done, but it shouldn’t take more than a few minutes.
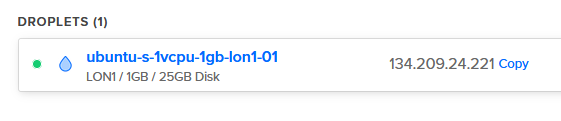
Once your server’s set up, DO should display its IP like in the above picture. You will use it in the next section to log in to your server.
First contact.
Next, you will connect to your server using SSH (Secure Shell) and go through basic setup tasks. I should note that this is a trimmed down version of other, better guides available elsewhere, like for instance DigitalOcean’s own Initial Server Setup with Ubuntu 22.04.
As of this writing, all major consumer operating systems come with SSH preinstalled. Figure out how to bring up the terminal for your specific system and type the following (replacing 1.2.3.4 with the IP from the previous section)
ssh root@1.2.3.4You should see a warning:
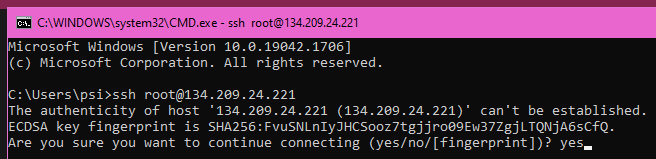
This warning will show up once because you’ve never connected to this server through this IP. Note that relationship.
You should type “yes” and continue.
Note that you will receive another, different warning, if you connect to this IP and there’s a different server on it (fingerprint mismatch).
Now that you’ve logged in, you should see something like this:
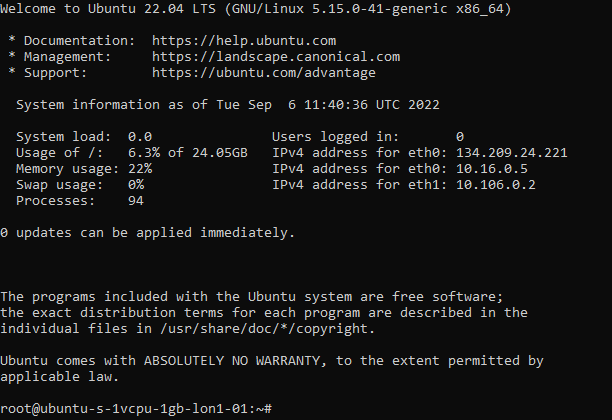
We’re gonna do multiple things now:
- Create a new user:
adduser name - Give that user sudo:
usermod -aG sudo name - Log out:
logoutor Ctrl+D - Log back in as the new user:
ssh name@1.2.3.4
You are now logged in as a normal user with sudo permissions. This means you can execute commands that need administrator permission by adding sudo at the start.
Opening up to the WWWeb.
In this section, we’re going to set up a firewall, and a web server.
First, we’re going to install nginx, a web server.
sudo apt install nginxAfter installing that, we’re going to configure UFW (“Uncomplicated FireWall”)
sudo ufw app list # display all available "apps". Nginx should be here!sudo ufw allow OpenSSH # ensure SSH is allowed on the firewall. this is important!sudo ufw allow "Nginx HTTP" # allow the Nginx web server to receive HTTP connectionssudo ufw enable # Turn UFW on.sudo ufw status # Check what's allowed on UFW. Nginx and OpenSSH should be listed!With UFW set up, you should now be able to open your server’s IP address on a browser! You should see something like this:
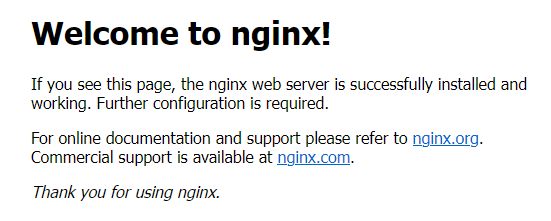
This is the default page for nginx. If you can see this, it’s alive!
File transfers and the index.
Now we need to figure out moving files in and out of the server. To do this we’re going to use FTP (File Transfer Protocol), but more specifically SFTP (SSH File Transfer Protocol).
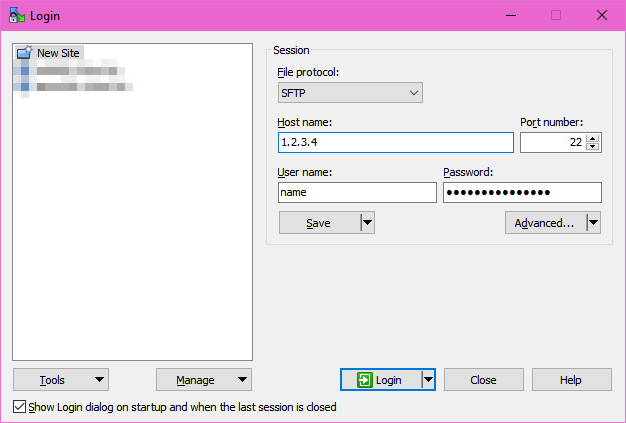
First, you need to install an FTP client. I recommend WinSCP on Windows.
Then, log in with the same server address and username/password combination as you did for SSH:
You should see something like this:
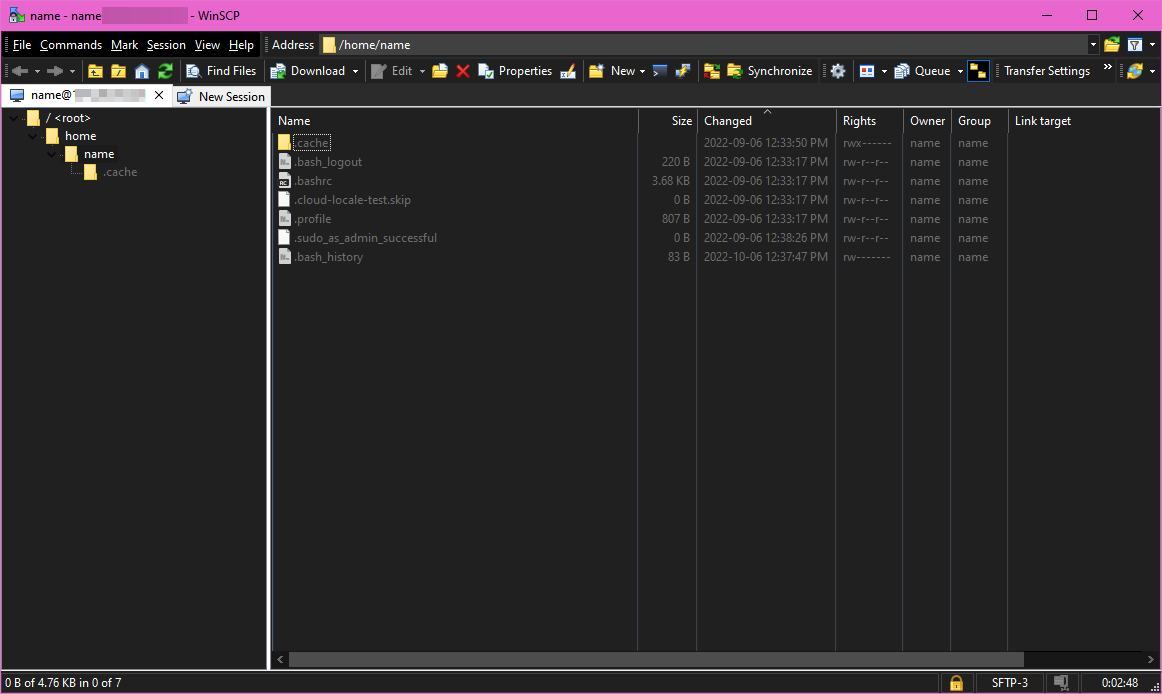
Your mostly empty home folder. You can drag files in here and they will be placed in an upload queue, and you can also move and delete files, create folders, etc.
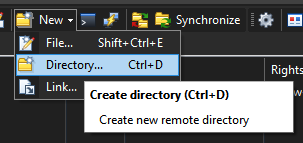
Let’s go ahead and create a folder to hold our videos and other files:
We also need to create a soft link from the Nginx file root at /var/www/html/ to our folder in the home folder (I made mine stuff).
To do that, we need to use sudo, so we can’t do it via WinSCP. Over SSH:
cd /var/www/html/ sudo ln -sv /home/name/stuff stuffWe also need to change the file permissions on our home and stuff folders:
chmod +rw /home/name/stuffWith that out of the way, we’re going to set up Nginx to display a file index of that folder.
Nginx’s configuration files live in /etc/nginx/. There, you’ll find the sites-available and sites-enabled folders. sites-available will contain the config files for any sites you have configured on Nginx, and sites-enabled has links to the configuration files of any sites that are actually enabled.
We’re only setting up one site though, so this won’t be complicated. Let’s open the default configuration file:
sudo nano /etc/nginx/sites-available/defaultNote that you need sudo in order to write to this file.
The file has a lot of comments. Here’s the default file with comments removed:
server { listen 80 default_server; listen [::]:80 default_server; root /var/www/html; index index.html index.htm index.nginx-debian.html; server_name _; location / { try_files $uri $uri/ =404; }}We’re going to edit it to remove the index directive, and add autoindex directives:
server { listen 80 default_server; listen [::]:80 default_server; root /var/www/html; index index.html index.htm index.nginx-debian.html; autoindex on; autoindex_exact_size off; autoindex_localtime off; server_name _; location / { try_files $uri $uri/ =404; }}Then, after saving the file, restart nginx to load your changes:
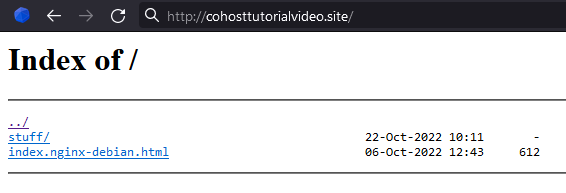
sudo systemctl restart nginxIf you check your page again it should look like this:
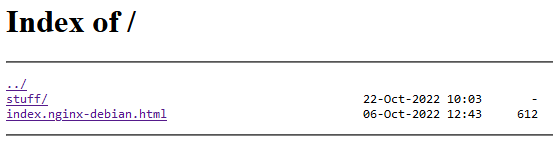
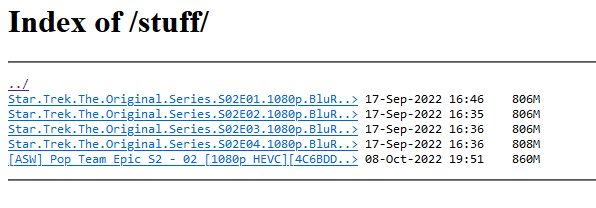
Clicking on the “stuff” link will show you the contents of the “stuff” folder. Which will be empty unless you’ve put anything in it – you can drag files into it through WinSCP and they’ll upload!
You can also delete the default index file in there if you want, you don’t need it.
Actually using it.
Now that you can upload files to your server, you can load them into Syncplay: Right-click on the playlist in the bottom right and add the URL for whatever file you wanna watch. For security reasons, everyone will have to add your server as a trusted domain, also.

Everyone’s client will buffer the video over time, and if anyone actually has the file in their media directories, it will just use the local file instead. You can also just drag a file in for the same effect.
Expert Territory (Zero Setup).
Okay. You’re already doing most of the work for your friends and supplying the content for them through your own server. What if they also didn’t have to install a separate program on their computer? What if they didn’t have to do any setup at all to watch stuff?
This section will detail what you need to do to achieve that.
In summary, we will still be hosting files on a server, but your friends will be watching over CyTube. To achieve this, we’ll need to:
- Acquire a domain name
- Acquire a TLS certificate, and serve files over HTTPS
- Learn to convert files to formats and sizes that can play on browsers
In order to play files from direct URLs on CyTube, they must be served over HTTPS. It is possible to acquire a TLS certificate for a bare IP, which is what you have at this point, but it is easiest (ie free) to get one through Let’s Encrypt, who will also automatically auto-renew them. However Let’s Encrypt only issues certificates for actual domain names, not bare IPs.
So… you need a domain name.
SO… I have my own domain name registered through gandi.net. Namecheap is also another domain registrar, for example.
Some tips on buying a domain name… Generally, normal english words and terms will be most expensive, so look for weird in-joke words or made-up terms for cheaper names. Also, take note of any promotions and special conditions that they might come with. “First year” discounts are pretty common, where they might charge you a very small amount for the first year and then a larger amount after.
Since I’m buying a domain just for this tutorial, I’m going for something extremely ugly and temporary. I’m not going to be renewing this next year:

After buying your domain, you need to edit its DNS records. DNS records are how your domain name connects to servers via IP, among other things. For more information, check out Namecheap’s guide, DNS Records Explained.
When you first get your domain name, your DNS records will likely come prefilled with a bunch of crap you don’t care about. For example, gandi.net domains come with free mailboxes, so the one I just bought comes with a ton of entries for that:
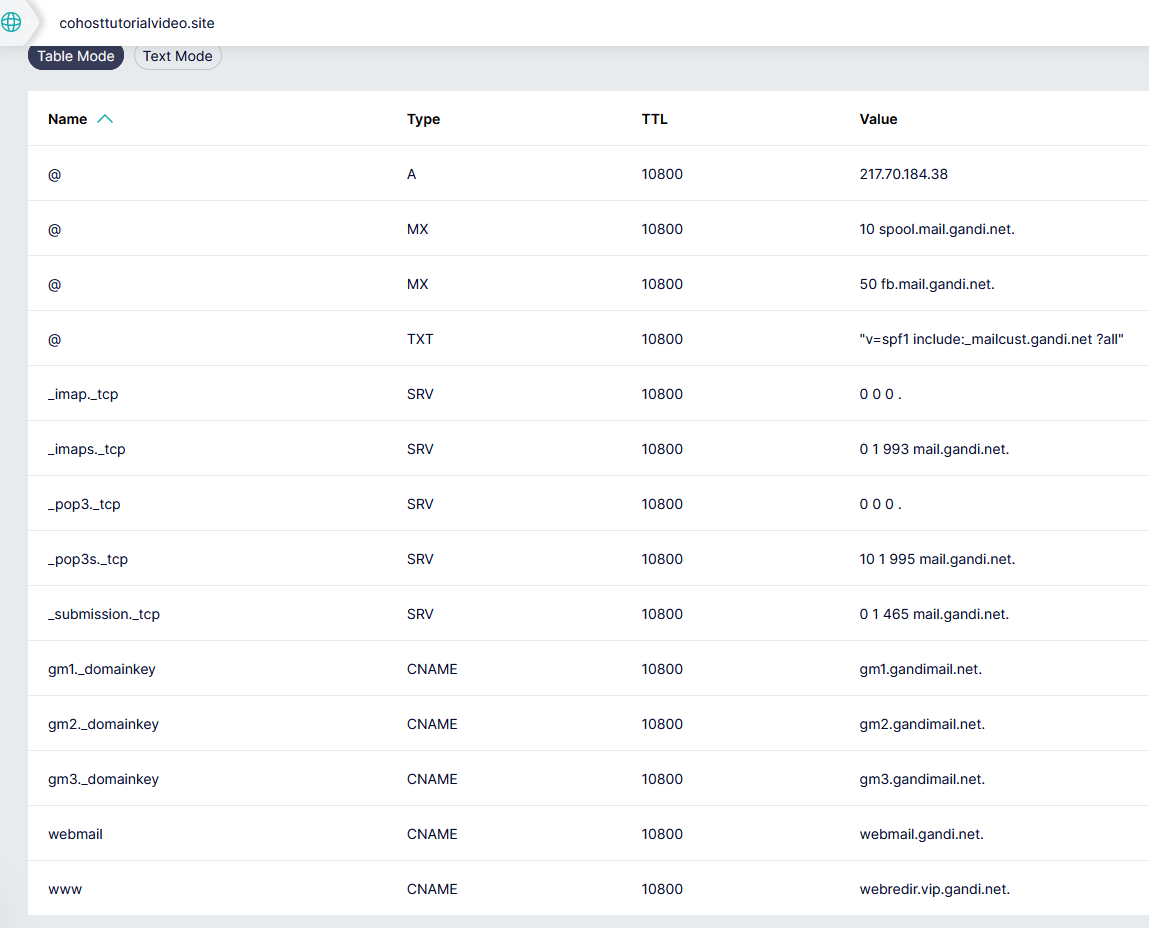
I don’t care about any of this. I’m going to delete all of these, and you can delete everything your DNS records come with if you want, as well. We will only need one record:
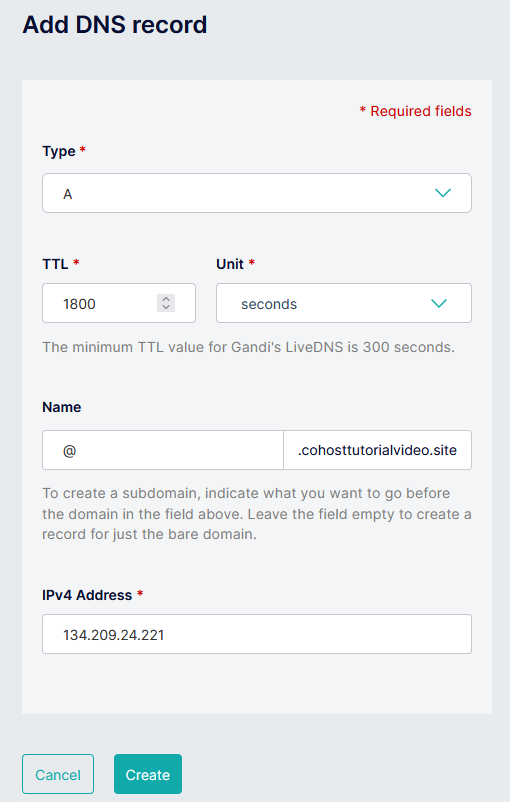
We’re setting up an “A” type record pointing to your server’s IP. The ”@” means we’ll get pointed to it by opening the main URL “cohosttutorialvideo.site”. You could set it to a subdomain like “whatever.cohosttutorialvideo.site” here if you want. The “TTL” value is the “Time To Live”, the frequency with which the DNS nameserver will automatically refresh its settings.
Now, after waiting at least as long as that TTL value, you should be able to see your site at the domain name you just bought! For me, that’s at http://cohosttutorialvideo.site. Note the http.
As a bonus, you can now SSH into your server using your new domain name:
ssh name@cohosttutorialvideo.siteAs previously mentioned, CyTube only accepts files served over HTTPS. To get that, we need a TLS certificate.
Becoming certified.
Head over to the Certbot website and select Nginx and whatever system you’re on. Follow the instructions, which will likely involve installing snapd (you don’t have to if you’re on Ubuntu 18 or over) and setting up the certbot utility.
Eventually, you will be asked to run this command:
sudo certbot --nginxProvide the information the utility asks for, and once you’re done, it will actually automatically edit your Nginx configuration file to enable HTTPS and also redirect from HTTP to HTTPS. Certbot also sets up a scheduled task to renew the certificate.
Early on in this guide we used UFW to allow HTTP connections on the firewall. We’re going to replace that rule so that HTTPS connections are also allowed:
sudo ufw delete allow "Nginx HTTP" sudo ufw allow "Nginx Full"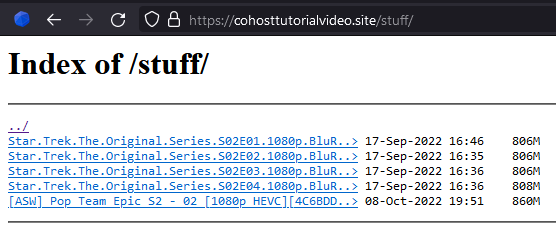
Now, the URLs for the files you put in here will be served over HTTPS.
With this, all that’s left is to talk about how video files work in the browser.
File considerations.
Okay. Now that your videos are served over HTTPS, you can just put them on CyTube, right?
WRONG.
Only certain codecs and containers are allowed to play on a browser. In particular, MP4 and WebM stand out.
Does that mean that if you have an MP4 file it will just work?
NO.
Sorry, but MP4 is a container, and may not have a supported codec. For example:
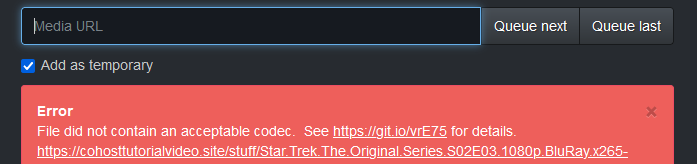
And finally, even if your file does already just work on the browser, it might just be plain too big. Remember, you and your friends are going to be downloading the file as it plays. If the video’s bitrate is too high, people might not be able to download the video faster than it plays!
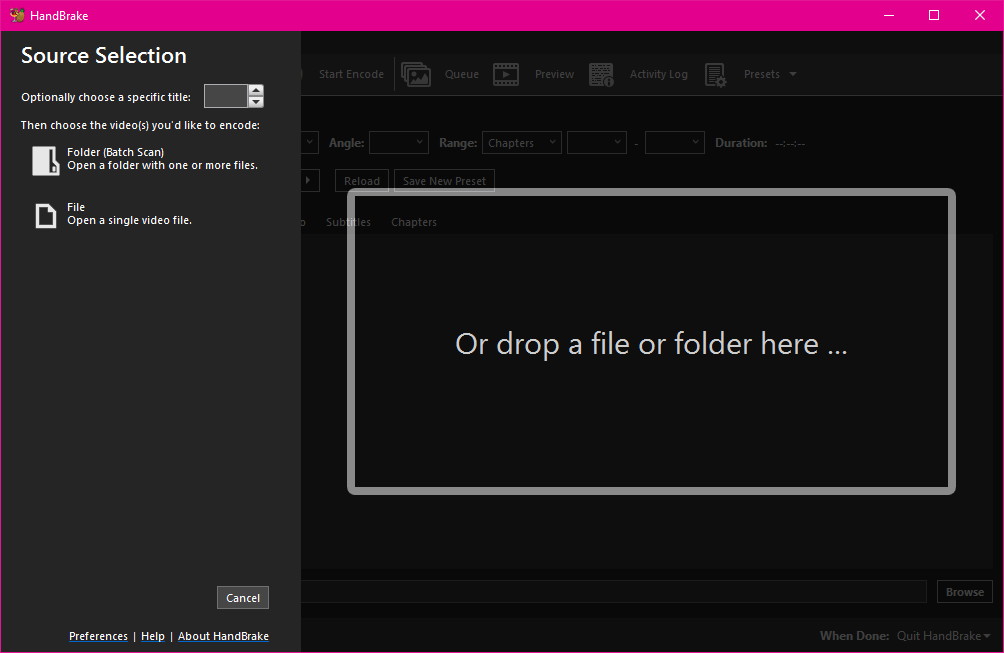
For all of these reasons, I re-encode my videos before uploading them to my server. I do this using Handbrake, and I follow this procedure:
First, drag in your file.
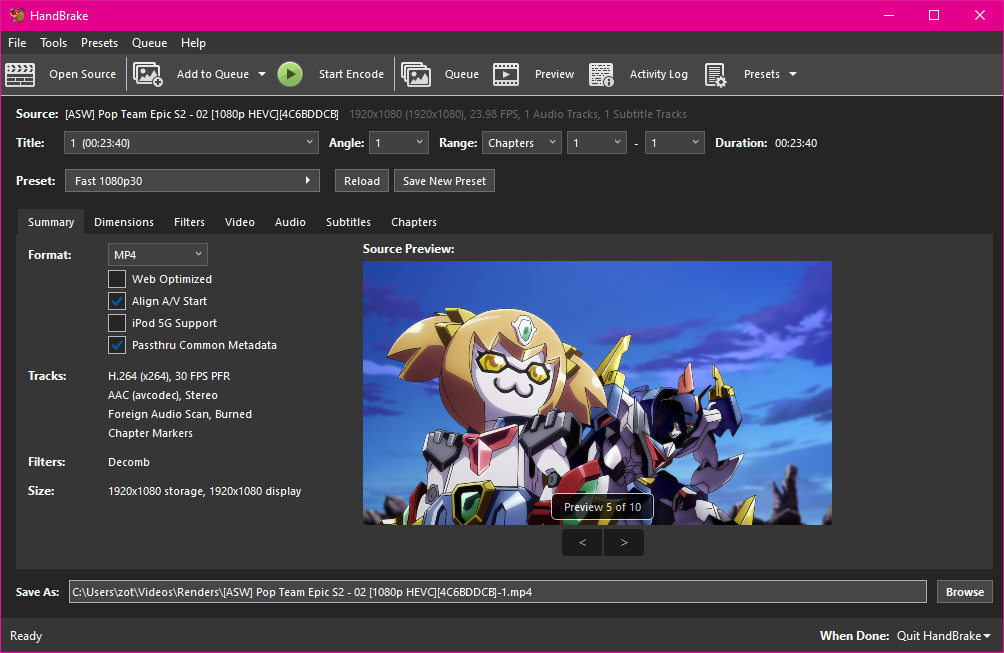
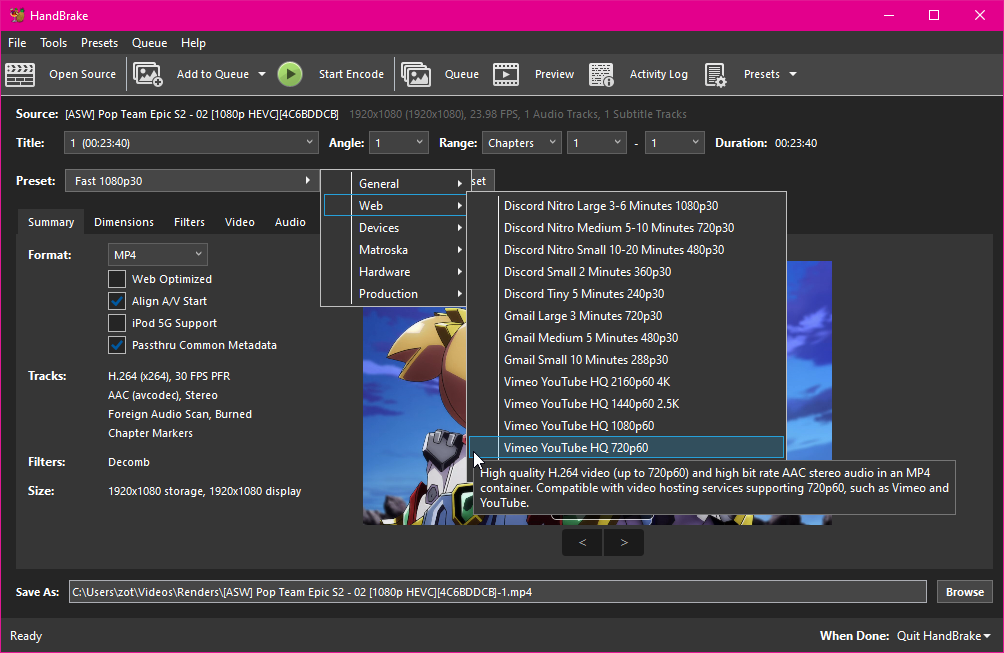
Then, select an appropriate preset. I usually use the “Vimeo YouTube HQ 720p60” preset:
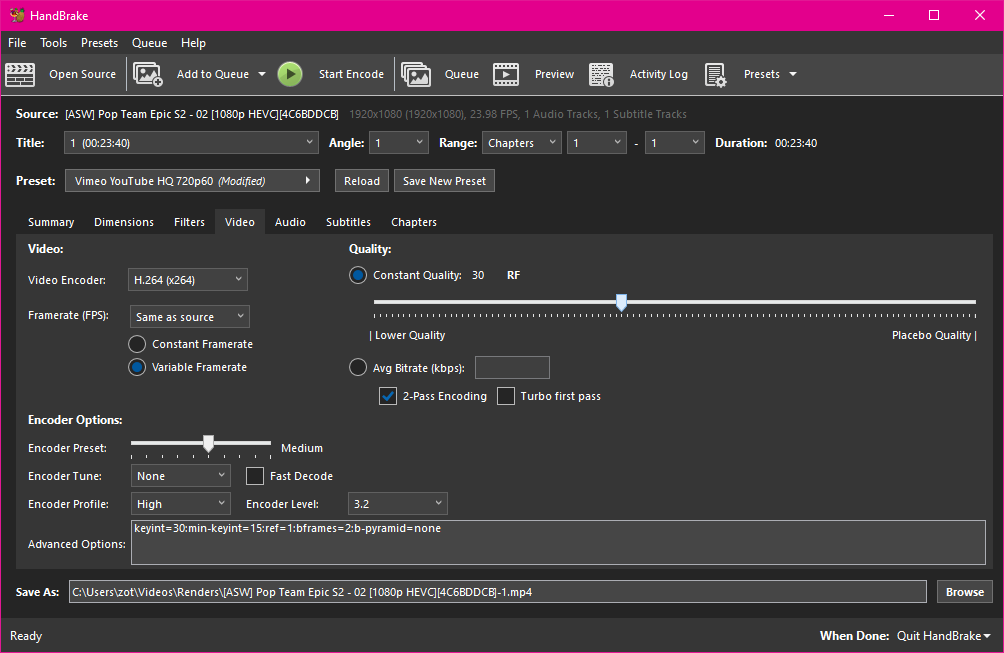
Switch to the “Video” tab, change the framerate to “Same as source”, and set it to “Constant framerate” under that. Then, set the “quality factor”. This will determine the bitrate of the output. This preset sets the quality to 19, and I usually crank it up to 30 (higher = smaller file).
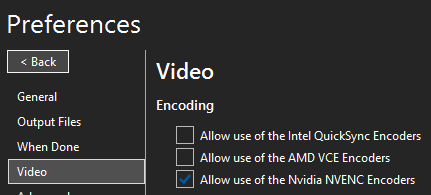
You might want to change the video encoder to Nvidia NVEnc, AMD VCE, or Intel QuickSync if available. Check if you have them enabled in Tools > Preferences > Video.
If the file I’m working with has multiple audio tracks, then I select the one I want in the “Audio” tab:
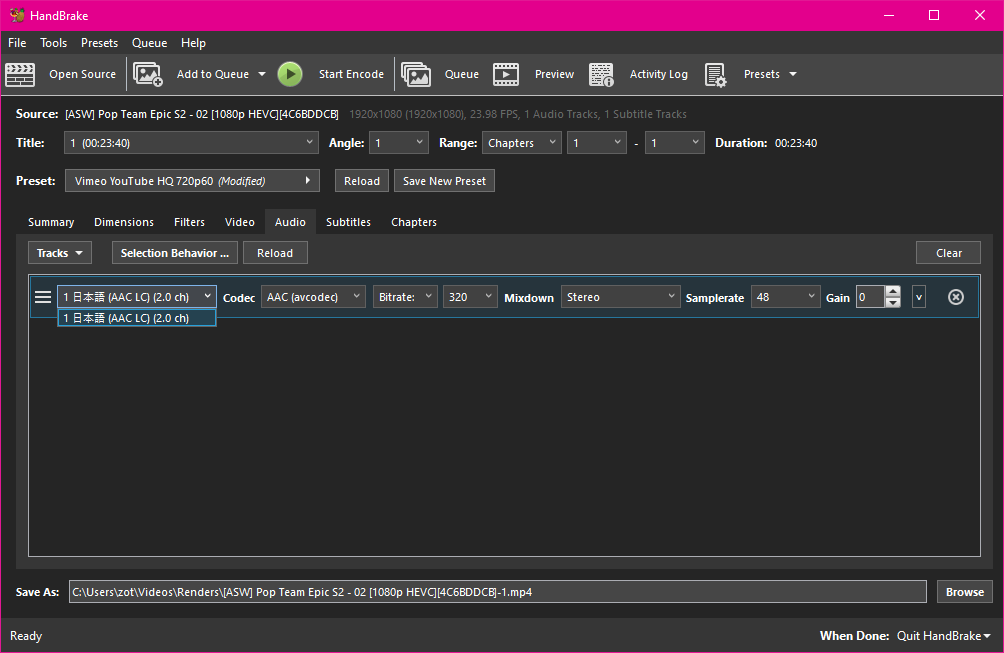
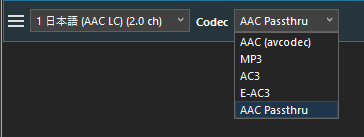
If your audio is already AAC, then you want to set the codec to “AAC Passthru”. Otherwise, leave the codec on AAC. AAC offers the best compatibility for our purposes, and you want to avoid re-encoding if possible.
And most crucially, if the file comes with a subtitle track, it will be available here:
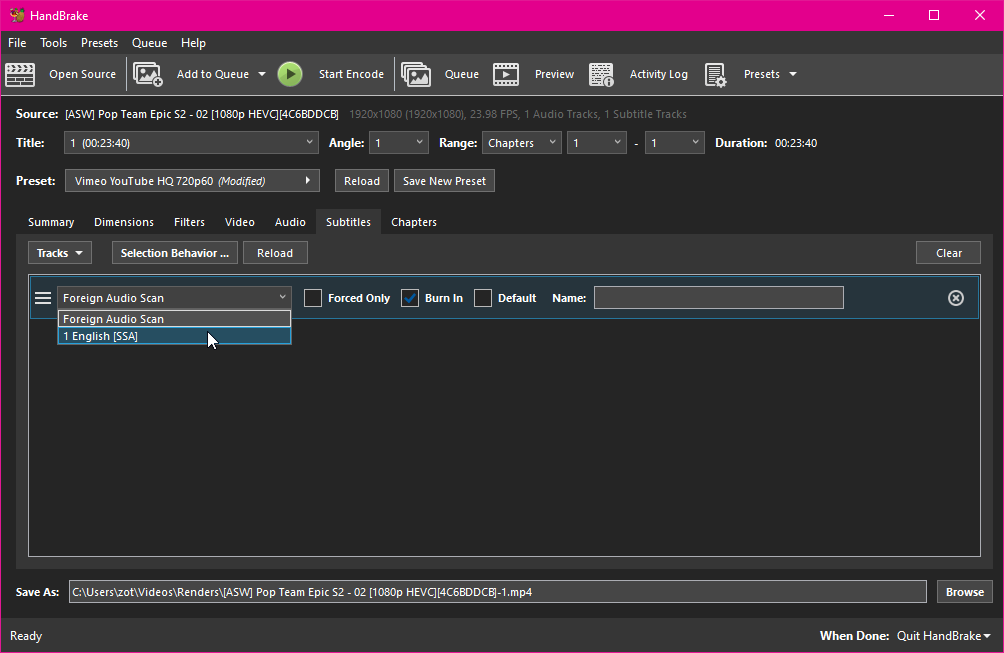
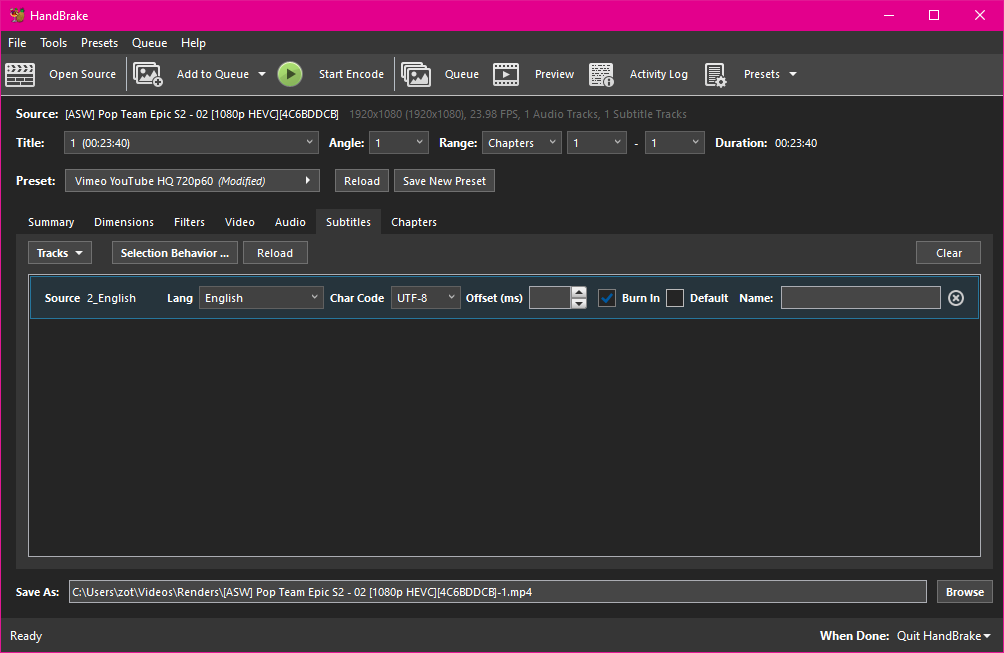
If you want these subtitles to show up in the final video, make sure to select them and turn “Burn In” on. “Burn In” will put the subtitle text directly into the video, which is unfortunately necessary when playing video on the browser, the way we are.
If your file does not have an included subtitle track and instead you have a separate subtitle file (e.g. .srt, .ass), then you’ll have to drag it in. Make sure to tick “Burn In” too.
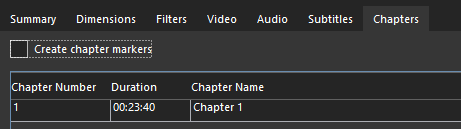
Finally, you can also tick chapter markers off, as they don’t matter for what we’re doing.
Now, feel free to hit the “Start Encode” button. This will probably take a while, and longer the bigger the source file. If you want, you can drag in another file, change the settings, and hit “Add to queue” so it starts that encode next.
Once your file is done rendering, you can go ahead and upload it over WinSCP. Once it’s in your server, you can copy the URL to it and put it on Cytube, and all your friends can join you there and watch!
I’ve hosted a weekly movie night for 4-10 people for over a year now, and I’ve always used this setup. Feel free to experiment with other configurations. You might want to set the Constant Quality to a lower value than the one above, just keep in mind the bitrate will go up as the quality improves. You might also want to set the Encoder Preset to a lower value if you don’t mind waiting, it’ll result in higher quality “for free”.
Thank you June, Liz, Mia, Jasmine, Will for proofreading. Thank you Camille for video encoding info.
Sunday 23rd October, 2022 • Auburn
Feed (Atom) • Feed (JSON)